
At its heart, preparing a trial balance is a four-step dance: you list every account from your general ledger, drop their final balances into either the debit or credit column, add up both columns, and then make sure they match. Think of this internal report as the fundamental check to prove your debits equal your credits before you even think about building your official financial statements.
Understanding the Role of the Trial Balance
Before we get into the nitty-gritty, let's talk about why the trial balance is such a cornerstone of the accounting cycle. It’s your first major checkpoint—an internal report that simply verifies the math of your general ledger. Is the total of all your debits equal to the total of all your credits? This isn't just busywork; it's the critical sanity check that confirms your double-entry bookkeeping system is working as it should.
This document is the bedrock for your more formal financial statements, like the income statement and the balance sheet. If this foundation is solid, the rest of the process becomes a whole lot smoother.
The Core Principle of Double-Entry Bookkeeping
The whole system is built on a single, elegant rule: every single business transaction hits at least two accounts. One account gets a debit, and another gets an equal and opposite credit. It's a beautiful, self-checking mechanism that ensures your books are always, and I mean always, in balance.
A trial balance won't catch every possible mistake—for instance, if you forgot to record a transaction entirely—but it's your first line of defense. It confirms your ledger is arithmetically sound and helps you catch simple errors before they snowball.
Natural Account Balances
To really get this right, you have to understand the personality of each account. Some accounts are naturally "debit" accounts, while others are "credit" accounts. For any small business owner, getting a handle on these bookkeeping basics for small business is non-negotiable if you want financial clarity.
Here's a quick cheat sheet on how this works:
- Debit Balances: These accounts go up with a debit. This group includes your assets (like Cash, Accounts Receivable, and Equipment) and your expenses (like Rent and Salaries).
- Credit Balances: These accounts go up with a credit. You'll find liabilities (Accounts Payable, Loans), equity (Owner's Capital, Retained Earnings), and revenue (Service Revenue, Sales) in this camp.
Once you know an account's natural state, you can spot problems almost instantly. For example, if you see your Cash account sitting with a credit balance, that’s a massive red flag. Something’s definitely off.
While learning to prepare a trial balance yourself is an invaluable skill, many businesses eventually turn to professional bookkeeping services to keep their records accurate and their time free. Either way, a solid grasp of these fundamentals is your key to success.
Compiling Your General Ledger Account Balances

Now that you understand the theory, it's time to get your hands dirty with the data. This is where you'll pull together all the individual transactions recorded in your general ledger and create a single, consolidated list of account balances. It’s like taking a financial snapshot of your company at the end of the accounting period.
Whether you're working with sophisticated accounting software or a classic paper ledger, the goal is the same: absolute precision. A single misplaced decimal or an overlooked account will throw your entire trial balance out of whack, forcing you to backtrack and hunt for the error.
Calculating Final Account Balances
First things first, you need to calculate the final balance for every single account in your general ledger. This involves more than just pulling a single number; you're summarizing all the debits and credits that have occurred within each account over the period.
For any given account, the process is pretty straightforward:
- Grab the beginning balance from the last period.
- Add up all the increases to the account (these are debits for assets and expenses, or credits for liabilities, equity, and revenue).
- Subtract all the decreases from the account (credits for assets and expenses, or debits for liabilities, equity, and revenue).
Let’s take your Cash account as an example. You'd start with your opening cash balance, add all the cash you received (debits), and then subtract all the payments you made (credits). The number you're left with is your ending cash balance. You'll apply this same simple logic to every other account on your books, from Accounts Receivable all the way to Retained Earnings.
Organizing Your List of Accounts
Once you have the final balance for each account, you need to arrange them in a specific order. This isn’t just about being tidy; it creates a standardized format that makes the trial balance easy to interpret and later use for building your main financial statements.
The standard order of accounts on a trial balance mirrors how they appear on the financial statements. This structure isn't random—it creates a logical path, moving from what the company owns and owes to what it has earned and spent.
The conventional sequence you'll want to follow is:
- Assets: Start with the most liquid ones, like Cash, and work your way down to long-term assets like Equipment.
- Liabilities: Next, list everything you owe, such as Accounts Payable or Loans Payable.
- Equity: After liabilities, you'll list Owner's Capital and Retained Earnings.
- Revenue: Then come your income sources, like Service Revenue or Sales.
- Expenses: Finally, list all your costs, including Rent Expense, Salaries, and Utilities.
Laying everything out this way serves as a natural checklist, making it much harder to accidentally leave an account out—a surprisingly common mistake. This step is a critical part of the bookkeeping cycle and is all about ensuring your records are solid. For a deeper look into verifying these numbers before you even start, our guide on what is general ledger reconciliation can be a lifesaver. A little organization here will save you hours of headaches down the road.
Building a Clear and Accurate Trial Balance Sheet

Alright, you've done the hard work of gathering the final balances from all your general ledger accounts. Now it's time to assemble them into a proper trial balance worksheet. This isn't just a list; it’s the blueprint of your entire accounting system, laid out for a quick but powerful health check.
The structure itself is refreshingly simple. You’re essentially creating a table with three core columns:
- Account Names: This is where you’ll list every account from your general ledger. Stick to the standard order: assets, then liabilities, equity, revenue, and finally, expenses.
- Debit Balances: For any account that ends the period with a debit balance.
- Credit Balances: And this one is for all accounts that have a final credit balance.
Think of it as sorting your accounts into two teams. The most important rule? An account will have a balance in either the debit or credit column, but never both.
Placing Accounts in the Correct Columns
Knowing where each account belongs is half the battle. Let's imagine a small service business. Its asset accounts (like Cash or Office Equipment) and expense accounts (like Rent or Salaries) will always populate the debit column.
On the flip side, liability accounts (Accounts Payable), equity accounts (Owner's Capital), and revenue accounts (Service Revenue) will fill the credit column. This layout gives you a fantastic visual gut check. If you see Service Revenue with a number in the debit column, that's an instant red flag something is wrong.
A trial balance isn’t just about making numbers match. It's the practical proof that your double-entry accounting system is working as it should—that for every transaction, there's an equal and opposite entry keeping your books in perfect harmony.
To see this in action, here’s a simplified layout for a small service-based business.
Example Trial Balance Structure for a Service Business
| Account Name | Debit ($) | Credit ($) |
|---|---|---|
| Cash | 15,000 | |
| Accounts Receivable | 5,000 | |
| Office Supplies | 500 | |
| Office Equipment | 10,000 | |
| Accounts Payable | 2,500 | |
| Owner's Capital | 25,000 | |
| Service Revenue | 8,000 | |
| Rent Expense | 3,000 | |
| Utilities Expense | 1,000 | |
| Salaries Expense | 1,000 | |
| Totals | 35,500 | 35,500 |
Notice how every account is neatly sorted, and the final totals for the debit and credit columns match perfectly. This is the goal.
Choosing the Right Preparation Method
You'll hear about a few ways to put a trial balance together, but in the real world, one method is used almost exclusively: the balance method.
Some old-school techniques involve listing the total debits and total credits for each account, but that's overkill for most businesses. The balance method just uses the final, single balance for each account. It's faster, cleaner, and gives you the exact numbers you need to jump straight into creating your financial statements.
In fact, it’s estimated that over 70% of businesses prefer the balance method simply because it’s the most direct path from raw data to actionable financial reports. It hits the perfect spot between useful detail and efficiency.
If you're handling this process yourself without accounting software, becoming skilled at how to build a financial statement in Excel is a game-changer and the perfect next step after mastering the trial balance.
Finalizing and Verifying Your Totals

This is the moment of truth. You’ve painstakingly listed every account and plugged its balance into the right column. Now comes the final, make-or-break step: adding it all up. Everything you've done to prepare the trial balance leads to this one simple, yet powerful, verification.
Go ahead and separately total the debit column and the credit column. Draw a line under the last number in each column and get the sum. If you’ve recorded every transaction perfectly under the rules of double-entry accounting, those two totals will match. To the penny.
The Significance of a Balanced Trial Balance
Seeing those identical totals is exactly what you're hoping for. It's the green light that confirms the mathematical integrity of your general ledger for the period. For every debit you recorded, an equal and opposite credit was posted somewhere in your books.
This entire check is built on the classic double-entry system, where every single financial event touches at least two accounts with equal debits and credits. But even with a solid system, manual data entry can be a real weak point. Some studies suggest errors can sneak into 20-30% of manually prepared trial balances, which really drives home how crucial a meticulous review is. You can learn more about how technology is improving accounting accuracy.
A balanced trial balance proves your ledger is arithmetically correct, but it doesn't guarantee complete accuracy. It’s a vital checkpoint, not a final destination. Think of it as confirming your calculations are sound before you move on to deeper analysis.
What a Balanced Total Doesn't Reveal
It's just as important to understand what this document can't tell you. A perfectly balanced trial balance can, unfortunately, still hide some pretty significant errors. These are often called "errors of principle" or "omissions," and they won't throw off your totals because the debits and credits still equal each other.
Here are a few classic mistakes a balanced trial balance will completely miss:
- A Transaction Was Never Recorded: If a sale or purchase was never entered, it's invisible.
- Posted to the Wrong Account: You correctly debited an account for $500, but you posted it to Office Supplies instead of Equipment. The totals still match.
- Compensating Errors: This is a tricky one. Two separate, unrelated mistakes just happen to cancel each other out perfectly.
So, while finalizing your totals is a key part of the process, it’s just one piece of a much larger review. It confirms your accounting equation is balanced across the ledger, which paves the way for creating accurate financial statements like the income statement and balance sheet.
How to Find Errors When Your Columns Don't Match
It’s a feeling every bookkeeper knows well. You've done all the work, you run the totals for your debit and credit columns, and… they don't match. Don't panic. Before you start thinking the worst, take a breath. An imbalance is almost never a major catastrophe; it's usually just a simple, fixable mistake hiding in plain sight.
The trick is to have a system for hunting it down. Don't just start re-checking everything at random. Your first move should be to calculate the exact difference between the two columns. That number is your biggest clue.
For instance, if the difference is divisible by 9, you've probably made a transposition error. This is the classic mistake of flipping two digits—writing $81 when you meant to write $18. The difference there is $63, which, what do you know, is perfectly divisible by 9.
Another common slip-up is a slide error, where the decimal point lands in the wrong spot. If your difference is a clean number like $90 (say, from posting $100 instead of $10), that's a good sign you should look for a misplaced decimal. These little math tricks can point you right to the problem and save you a ton of time.
This chart breaks down a simple workflow for finding and fixing these kinds of common accounting errors.
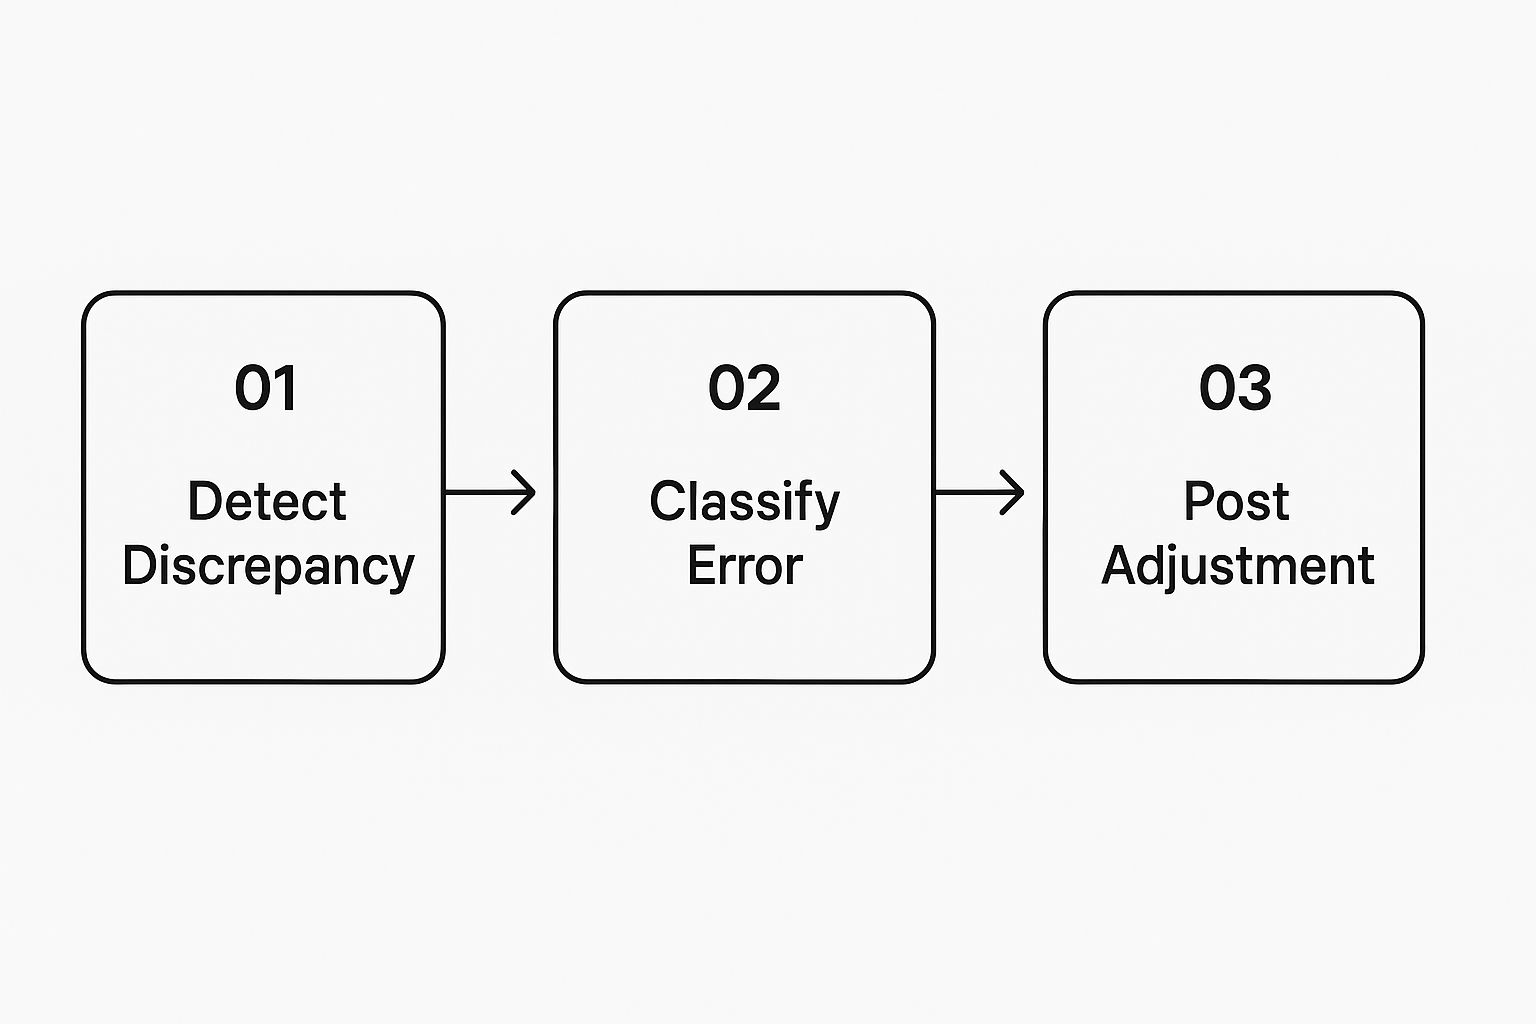
As you can see, figuring out the type of error is a key step. It turns a moment of panic into a manageable task by telling you exactly what to look for.
A Systematic Approach to Troubleshooting
If the quick math doesn't reveal the culprit, it’s time to roll up your sleeves and get methodical. The idea is to trace the numbers from the trial balance all the way back to their source.
First, double-check your addition in the trial balance columns. I know it sounds painfully obvious, but a simple calculator typo happens to the best of us. If the math checks out, move on to comparing the balances on your trial balance against the final balances in your general ledger.
- Go through each account, one by one. Did the balance for Accounts Payable transfer over correctly?
- Scan for missing accounts. It's easy to completely forget to pull over an account like Rent Expense.
- Eyeball the column placement. Is an asset like Office Equipment somehow sitting in the credit column? It should be a debit.
When you've been staring at a screen full of numbers for hours, your brain can start playing tricks on you. My go-to method is to read the numbers from the general ledger out loud while I physically tick them off on the trial balance. It forces you to slow down and helps you catch things your tired eyes might otherwise glaze over.
Tracing Back to the Source
Still no luck? Then the error is probably buried a little deeper, either in the general ledger accounts themselves or in the original journal entries. This just means you have to retrace the transaction's steps.
Pick an account that looks suspicious and review every debit and credit posted to it for the period. Did a debit accidentally get posted as a credit? Was the same entry posted twice?
This kind of detective work is just part of good bookkeeping. In fact, these exact troubleshooting steps are a miniature version of the broader account reconciliation best practices that keep your financial records accurate and reliable month after month. Follow a structured process like this, and you'll turn that frustrating discrepancy into a solved problem in no time.
Clearing Up Common Trial Balance Questions
Once you’ve gone through the process a few times, a few questions inevitably surface. Knowing the "how" of preparing a trial balance is one thing, but understanding the "why" and its role in the larger accounting cycle is what really makes it click.
Let's dive into some of the most common questions I hear to iron out any confusion.
One of the first things people ask is, "How often should I be doing this?" The gold standard is to prepare a trial balance at the end of every single accounting period. For most businesses, that means doing it monthly.
Running it this often acts as an early warning system. You'll catch small errors before they have a chance to grow into a massive headache at year-end. Plus, it's a critical step for generating those monthly financial statements that give you a real-time pulse on your business's performance.
Trial Balance vs. Balance Sheet: What’s the Real Difference?
This is a big one. It's easy to mix them up, but their jobs are completely different.
Think of the trial balance as an internal checklist, a behind-the-scenes tool used by you or your accountant. Its one and only purpose is to confirm that the total of all your debit balances equals the total of all your credit balances. It's a comprehensive list that includes every account in your general ledger—revenues, expenses, assets, the whole lot.
The balance sheet, on the other hand, is one of the main financial statements you'd show to a banker, investor, or anyone outside the company. It’s a formal snapshot of your financial health on a single day and only shows three core account types:
- Assets
- Liabilities
- Equity
The easiest way to remember it? The trial balance is the internal proofing tool you use to make sure the numbers that eventually go into your balance sheet are mathematically sound.
Don't make the mistake of thinking a balanced trial balance means your books are perfect. It’s a fantastic check for mathematical accuracy, but it’s not foolproof. Think of it as a crucial checkpoint, not a guarantee of flawless accounting.
For instance, if you forgot to record an entire transaction, the trial balance would still balance, but your financial picture would be wrong. The same goes for posting a debit to the wrong account—say, misclassifying a computer purchase as "Office Supplies" instead of "Equipment." The debits and credits still match, but the information is misleading.
How Technology Has Changed the Game
Not long ago, preparing a trial balance was a painstaking manual exercise, full of pencils, big ledger paper, and a high risk of human error. Thankfully, things have changed. Since computerized accounting took hold in the 1980s, the process has been almost completely automated.
Today, well over 85% of medium to large companies in developed countries rely on accounting software. The impact is huge—these systems can slash the time it takes to prepare a trial balance by 50%-70%. This frees up accountants to focus on analysis and strategy instead of just number-crunching. You can read more about the evolution of trial balance preparation to see how far we've come.
Whether you're using software or learning the old-school way, getting the fundamentals right is what matters. To get better at explaining complex financial tasks, you might find guides on creating effective step-by-step instructions incredibly helpful.
Tired of manually wrestling with bank statements? The software from Bank Statement Convert PDF instantly converts your PDF statements into clean, usable Excel spreadsheets, saving you hours of tedious data entry. Transform your bank statements into Excel effortlessly today!