
When it comes to bank reconciliations, the goal is pretty straightforward: you need to create a reliable system to compare your company’s internal cash records with what the bank says. It's a fundamental process that helps you methodically match transactions, pinpoint any discrepancies like outstanding checks or sneaky bank fees, and ultimately, make sure your financial records are accurate.
Why Excel Still Dominates Bank Reconciliations
You might wonder why, with all the specialized accounting software out there, so many finance pros still swear by Excel. The truth is, for a huge number of small and mid-sized businesses, the flexibility and sheer cost-effectiveness of doing a bank reconciliation in Excel can't be beaten. It gives you a level of control and transparency that you sometimes lose with off-the-shelf software.
Getting this process down in a spreadsheet is about more than just saving a few bucks. It's about building a core financial skill. It forces you to really understand the "why" behind your numbers and gives you a crystal-clear picture of your company's cash flow.
The Power of Flexibility and Control
Unlike rigid accounting software that locks you into its workflows, Excel is essentially a blank canvas. That adaptability is its biggest advantage. You can build a reconciliation template that’s tailored perfectly to your business, whether you need to add custom columns for different project codes or create unique summary reports.
The real win with Excel is creating a rock-solid audit trail. Every single formula, every matched transaction, and every adjustment you make is right there, completely visible and traceable. That kind of transparency is priceless during financial reviews and helps you develop a much deeper understanding of how money is actually moving through your business.
A Foundational Skill for Financial Literacy
Automation is great, but wrestling with the data yourself in Excel really teaches you the nuts and bolts of accounting. For many businesses, a well-built bank reconciliation Excel template is the go-to tool. The typical process involves pulling in data from your bank statements and your general ledger, then systematically comparing the two. You can use sorting features and formulas like VLOOKUP or SUMIF to flag differences automatically.
Even so, you'll always run into challenges like timing differences or lumped-together transactions that demand a manual review—and that’s where your analytical skills get sharper. If you want to dive deeper, NetGain.tech has a complete guide on Excel templates for bank reconciliation.
Ultimately, learning to reconcile in Excel gives you skills that go far beyond just balancing a bank account:
- Enhanced Problem-Solving: You're not just clicking a button; you're learning how to hunt down and investigate discrepancies.
- Deeper Data Insight: You become intimately familiar with your company’s transaction patterns and financial health.
- Cost-Effective Management: You get to skip the monthly subscription fees that come with most accounting platforms.
Setting Up Your Data for Flawless Reconciliation
Here’s a secret I've learned from years of wrestling with spreadsheets: a fast, accurate bank reconciliation on Excel has less to do with fancy formulas and more to do with clean, organized data from the start. It’s like a chef’s mise en place. Get your prep work right, and the actual cooking—or in our case, reconciling—becomes a breeze.
The old saying "garbage in, garbage out" has never been truer. If the data from your bank and your general ledger don't line up structurally, you’ll spend more time fixing mismatched entries than actually finding discrepancies. Our goal is to make both datasets speak the same language before we even think about matching them.
Downloading and Structuring Your Data
First things first, you need to pull the transaction data from your bank's online portal and your own accounting system. For working in Excel, your best bet is almost always a Comma-Separated Values file, or .CSV. Thankfully, nearly every bank and accounting platform offers this as a standard export option.
Once you have your two .CSV files—one with bank transactions and one with your internal book records—open them up in Excel. I find it’s always a good practice to keep them in separate tabs within the same workbook. Label them clearly, something like "Bank_Data" and "Book_Data," so you know exactly what you're looking at.
Pro Tip: Before you do anything else, make a copy of the original raw data files. This is your safety net. If you make a mistake while cleaning up the data, you can always go back to the original without having to download everything all over again.
Now it's time to get rid of the noise. Bank exports are notorious for including extra columns that are useless for reconciliation, like "Running Balance" or "Bank Branch ID." Just delete them. A cleaner view helps you focus on the columns that actually matter:
- Date: The day the transaction cleared.
- Description: The who, what, and why of the transaction.
- Amount: The transaction value, which might be in one column or split into debits and credits.
If you want a blueprint for how to structure everything, using a pre-made template can be a massive help. It shows you what the end goal should look like. You can see a great example by exploring a professional bank reconciliation statement template to get a feel for the proper layout.
Essential Data Cleaning Techniques
With your data imported, the real work begins. Inconsistent formatting is the number one killer of a smooth reconciliation process.
A classic problem is the date format. Your bank file might use "01-Jan-2024," while your books use "1/1/2024." Excel sees these as different things. To fix this, just select the entire date column, right-click and go to "Format Cells," and choose a single, consistent format for both sheets. I personally prefer YYYY-MM-DD because it sorts perfectly.
Another common headache is messy transaction descriptions. You might see something like "DEPOSIT #4582 – ONLINE PAYMENT – CUST123" all crammed into one cell. This is where Excel’s Text to Columns feature (under the Data tab) is a lifesaver. You can instantly split that jumbled text into separate columns using a delimiter like a hyphen. This gives you clean, usable data points—like a customer ID or payment type—which makes matching much, much easier down the road.
Building Your Reconciliation Template from Scratch
While grabbing a pre-made template is tempting, there’s a huge advantage to building your own bank reconciliation on Excel template from the ground up. You gain total control, a much deeper understanding of your cash flow, and a tool that’s perfectly molded to your business. Think of it less as a task and more as building your own financial command center.
The best way I've found to structure this is with a multi-tab workbook. This approach keeps your raw data separate from your actual reconciliation work, which makes everything cleaner and way easier to manage down the road.
Just open a new Excel workbook and create three separate tabs:
- Bank Data: This is where you’ll paste the transaction data you download directly from your bank.
- Book Data: This tab is for the corresponding transactions from your company's own records (like your general ledger or accounting software export).
- Reconciliation: This is where the magic happens. We'll set up this tab to automatically compare the other two and instantly flag any differences.
Structuring Your Data Tabs
For both your "Bank Data" and "Book Data" tabs, consistency is everything. You need to make sure each tab has at least these three core columns: Date, Description, and Amount. You can always add more detail later, like a "Check Number" or "Transaction Category" column, but those three are the absolute must-haves.
A pro tip I always follow is to split debits and credits into their own columns. Most bank exports lump everything into a single "Amount" column, showing withdrawals as negative numbers. It’s much cleaner to separate them. You can do this easily with a simple IF formula. For example, create two new columns, "Debit" and "Credit," and use a formula like =IF(C2<0, ABS(C2), "") for debits and =IF(C2>0, C2, "") for credits, assuming the original amounts are in column C.
This infographic breaks down the basic flow for recording a transaction, which is the foundation of the data you’ll be working with.
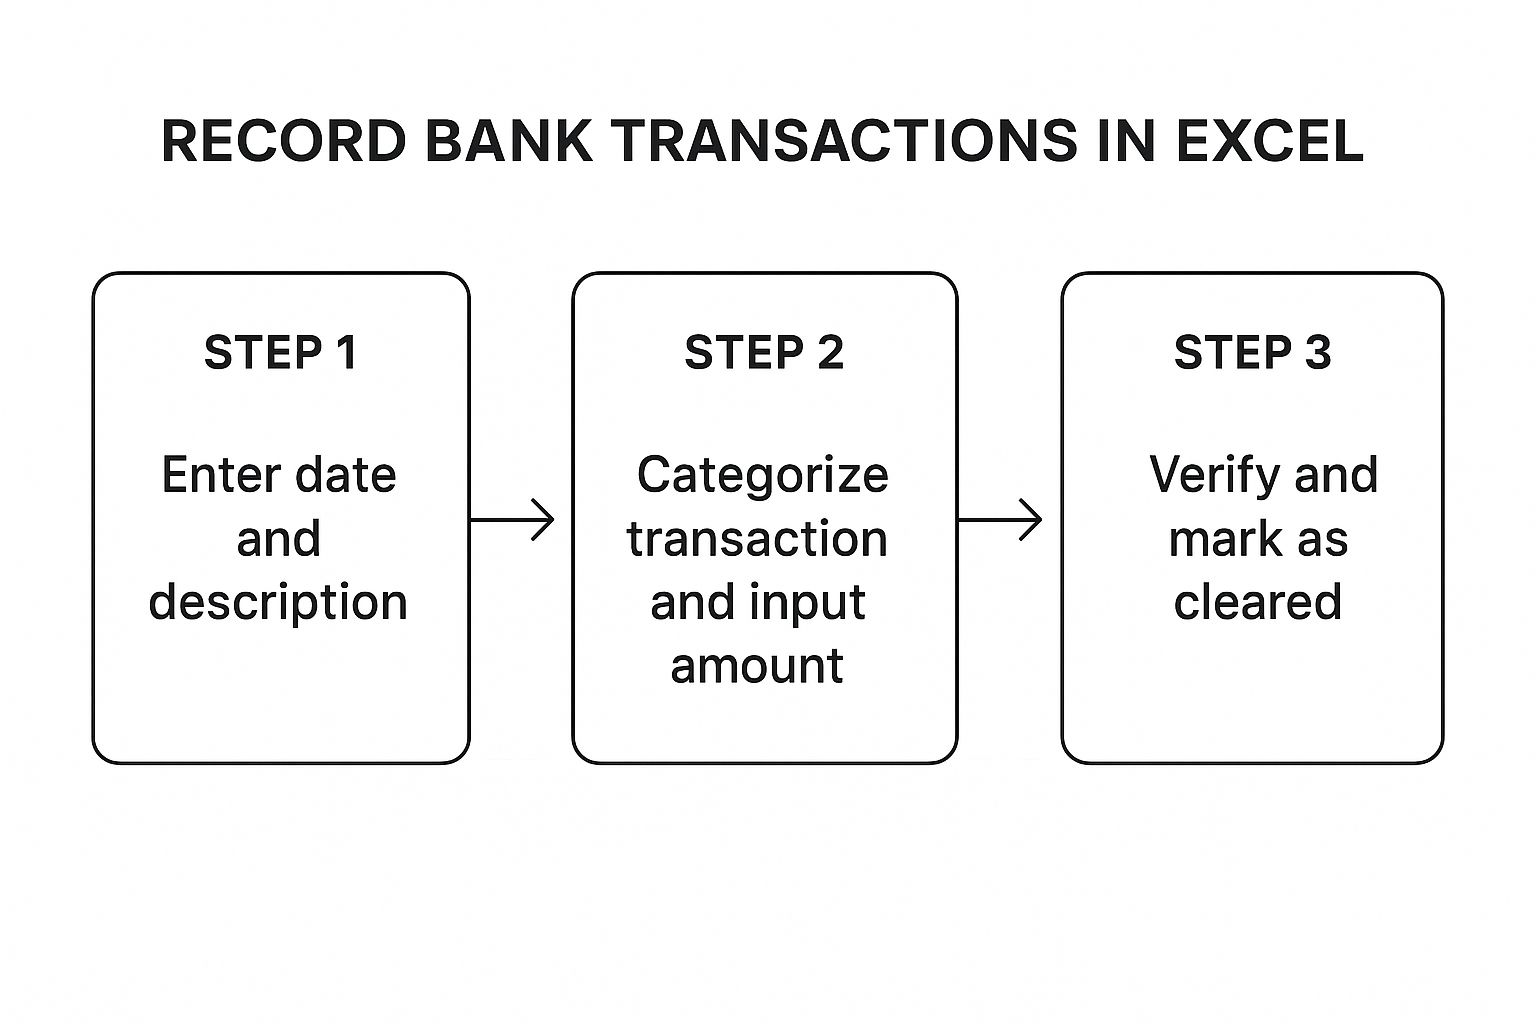
As you can see, getting the data right from the very start—from the date to the exact amount—is the crucial first step before any matching can even begin.
The Magic of the Reconciliation Tab
Alright, let's jump over to the "Reconciliation" tab. This is where we'll pull everything together and let Excel do the heavy lifting.
First, I always set up a high-level summary box right at the top. This gives you a quick snapshot of where things stand. Include these fields:
- Book Balance: Use a
SUMfunction to get the total from your "Book Data" tab. - Bank Balance: Do the same with
SUMfor your "Bank Data" tab. - Difference: A simple subtraction (
Book Balance - Bank Balance) shows you the variance at a glance.
The initial number you see in the "Difference" field isn't a mistake—it's your starting point. This figure represents the sum of all the outstanding checks, deposits in transit, and other reconciling items you’re about to uncover.
Now for the core of the template. I like to create a two-sided layout: your book transactions on the left and your bank transactions on the right. This is where we’ll bring in the formulas that automate all the tedious checking. For a bank reconciliation on Excel, your go-to functions are VLOOKUP or, my personal preference, the more powerful and flexible XLOOKUP.
To see this in action, you could add a "Found in Bank?" column next to your list of book transactions. An XLOOKUP formula can then take a transaction's amount and search for a matching one in the bank data. If it finds a match, it can return a simple "Matched." If not, it will show an error like #N/A, which instantly flags that item for you to investigate.
This one formula automates what would otherwise be hours of manually ticking and tying transactions. If your data needs a bit of cleanup first, it's useful to know the right formatting. For instance, knowing how to convert an Excel file to CSV is a common and necessary step for ensuring compatibility between different systems.
To help you get started, here are the essential formulas you'll be using in your reconciliation tab.
Essential Formulas for Your Reconciliation Template
This table is a quick reference for the key Excel formulas that will automate matching and help you pinpoint discrepancies in your template.
| Formula | Function | Practical Example |
|---|---|---|
| SUM | Adds all numbers in a range of cells. | =SUM(Book_Data!D:D) to get the total book balance. |
| IF | Checks whether a condition is met and returns one value if TRUE, and another if FALSE. | =IF(C2<0, ABS(C2), "") to separate debits from credits. |
| XLOOKUP | Searches a range for a match and returns the corresponding item from a second range. More flexible than VLOOKUP. | =XLOOKUP(A2, Bank_Data!A:A, Bank_Data!A:A, "Not Found") to check if a book transaction exists in the bank data. |
| COUNTIF | Counts the number of cells within a range that meet a given condition. | =COUNTIF(F:F, "Matched") to see how many transactions have been successfully reconciled. |
| SUMIF | Adds the cells in a range that meet a specific criteria. | =SUMIF(G:G, "Bank Fee", D:D) to total all bank fees recorded in your books. |
Having these formulas in your toolkit transforms the reconciliation process from a manual chore into a streamlined, automated system.
When you’re dealing with hundreds or even thousands of transactions a month, wrestling with formulas like XLOOKUP for every single line item becomes a serious time-sink. For any business with a high volume of activity, this is where you need to move beyond basic formulas and really master Excel's Pivot Table feature. It's the go-to tool for professionals who need to make sense of massive datasets without losing their minds.
Think of a Pivot Table as a smart summary tool. Instead of scrolling through an endless sea of transactions, you can instantly group, sort, and calculate totals based on any field you choose. This birds-eye view is invaluable for spotting major discrepancies right away, letting you focus your attention where it's truly needed.
Getting Your Data Ready for the Pivot Table
First things first, you need to bring your two separate worlds—your bank data and your book data—together. A Pivot Table can't work its magic on two different sheets, so the goal is to create one master list.
Start by copying all your cleaned-up "Book Data" and pasting it directly underneath your "Bank Data" within the same worksheet.
Now, you have one big table, but you need a way to tell which transaction came from where. This is a simple but crucial step: add a new column and call it something like "Source". For every row that came from your bank statement, type "Bank." For every row from your accounting records, type "Book." This little tag is what will allow the Pivot Table to slice and dice the data correctly.
For more precise matching, I also recommend creating a unique identifier for each transaction. A great way to do this is by combining the date and the transaction amount into one text string. You can create a new column, maybe called "UniqueID," and use a formula like =TEXT(A2,"YYYYMMDD")&"_"&B2. This assumes your date is in cell A2 and the amount is in B2. This unique key is a lifesaver for matching items.
A common challenge in bank reconciliation is the sheer volume of transactions, which for larger organizations can number in the thousands each month, making manual comparison incredibly error-prone. Using Excel Pivot Tables enhances both the efficiency and accuracy of this process by allowing you to consolidate and summarize data from both bank and accounting records into one interactive report. This simplifies finding discrepancies by grouping transactions by date, amount, or type.
Constructing the Reconciliation Pivot Table
With your data prepped and unified, you're ready to build. Click anywhere inside your combined data table, then head to the Insert tab and select PivotTable.
Excel will open a new sheet with the PivotTable Fields pane on the right. This is your command center. Here's how to set it up for reconciliation:
- Rows: Grab your "UniqueID" field and drag it into the Rows area. This will create a separate row for every unique transaction.
- Columns: Drag the "Source" field into the Columns area. This is where the magic happens—it will create "Bank" and "Book" columns side-by-side.
- Values: Finally, drag your "Amount" field into the Values area. This will populate the table with the dollar amounts for each transaction, filed neatly under its source.
What you get is a powerful, at-a-glance report. If a transaction cleared the bank and is also in your books, you'll see the amount listed in both the "Bank" and "Book" columns. If you have an outstanding check, you’ll see an amount under "Book" but a blank space under "Bank." This visual contrast instantly flags every reconciling item without needing a single complex formula.
Of course, all of this hinges on having clean data to begin with. If your bank statements are in PDF format, the first hurdle is just getting that information into Excel cleanly. Using a reliable PDF to CSV converter is a non-negotiable first step that can save you hours of tedious and error-prone data entry.
Solving Discrepancies and Finalizing Your Report
https://www.youtube.com/embed/T3nrEfQqgaI
Alright, let's talk about the moment of truth. You’ve followed all the steps, you've imported your data, and the numbers… don't match. Don't panic. This is a completely normal part of the process, not a sign that you've messed up.
Think of that initial difference between your bank balance and your books as a starting point. It's simply the total of all the reconciling items you’re about to uncover. This is where the real work of reconciliation begins—finding those transactions recorded by one side but not yet the other.
Diagnosing Common Reconciliation Problems
When you start digging into the differences, you'll find they usually stem from a handful of common issues. Most of the time, it's just a matter of timing. These aren't errors, just the natural lag that happens in banking.
You’ll almost certainly run into these:
- Outstanding Checks: These are checks you've written and recorded in your books, but the recipient hasn't cashed them yet. So, the money is gone from your records, but it's still sitting in your bank account.
- Deposits in Transit: The reverse of an outstanding check. You’ve recorded a customer payment in your books, but the deposit hasn't officially cleared the bank by the end of the statement period.
- Bank Fees or Interest: It's easy to forget these. The bank might tack on a monthly service fee or pay you a few dollars in interest. These show up on the bank statement, but you won't have them in your books until you see them there.
Another classic culprit? Simple human error. A transposed number here, a misplaced decimal there—it happens to the best of us. These small data entry mistakes can throw your entire reconciliation off and are surprisingly common.
The secret is to work through each discrepancy methodically. When the numbers don't line up, just use your reconciliation worksheet to categorize each item. This builds a clear, logical bridge that explains exactly why your book balance doesn't match the bank's.
Creating Adjusting Entries and Finalizing
Once you've identified items that originated at the bank—like service charges or interest income—you need to get them into your own records. This is where adjusting journal entries come in.
For example, to account for a monthly service fee, you'd create a journal entry that debits an expense account like "Bank Service Charges" and credits your "Cash" account. This single step updates your books and gets them closer to matching the bank.
Items like outstanding checks or deposits in transit are different. They don't require an adjusting entry because they're just timing issues that will sort themselves out in the next month. You just list them on your reconciliation report.
Your finished report is the final proof. It should clearly start with the bank balance, list out all the adjustments (like adding deposits in transit and subtracting outstanding checks), and land on the adjusted bank balance. Then, it does the same for your book balance, arriving at the exact same adjusted number. This final, balanced report is a vital document for you, your management, and any auditors.
If you’re starting this whole process with PDF bank statements, getting clean data from the get-go is critical. It's worth learning how to convert a PDF to CSV for free to avoid data entry headaches down the line.
Your Top Excel Reconciliation Questions, Answered

Even with the best template in hand, you're bound to run into a few tricky situations when you're deep in an Excel bank reconciliation. I've been there. Let's walk through some of the most common questions that pop up and get you some clear, practical answers.
What’s the Best Way to Handle Batched Deposits?
This is a classic headache. Your bank statement shows one big deposit for $5,000, but your own records show five different $1,000 sales invoices that make up that total. Trying to match them one-to-one is a dead end and, honestly, a huge source of frustration.
Here’s a pro tip: use a "helper column."
In your company's sales data, create a new column and assign a unique 'Deposit ID' (like "DEP-0715") to all the individual payments that were bundled into that single bank deposit. Then, find that lump sum on your bank data and give it the exact same ID.
Now you're no longer trying to match different amounts. Instead, a SUMIF formula can do the work. It will add up every transaction in your books that shares the 'DEP-0715' ID and compare that one total to the single deposit from the bank. It's a surprisingly simple fix for a very messy problem.
Can This Process Be Fully Automated in Excel?
You can get remarkably close to full automation, often handling over 90% of your transactions without needing to write a single line of complex code. By combining Power Query (for importing and cleaning your data) with powerful formulas like XLOOKUP and SUMIF, you can build a system that does most of the heavy lifting for you.
But what about 100% automation? That's the tricky part. Getting a system to account for every possible human error or bizarre one-off transaction is nearly impossible without diving into VBA macros or dedicated accounting software.
Frankly, you'll always want a human eye for the last few discrepancies. Investigating those outliers isn't a failure of the process; it's a fundamental part of good financial control.
How Often Should I Be Reconciling My Accounts?
For most businesses, reconciling monthly is the sweet spot. This lines up perfectly with when you receive your bank statements and fits neatly into your regular financial reporting cycle. It’s a reliable rhythm that keeps your finances in check.
However, if your business deals with a high volume of transactions or manages very tight cash flow, you might find that reconciling more often—maybe weekly or even daily—is a lifesaver. It gives you a real-time pulse on your cash position.
The great thing about using an Excel template is its flexibility. You can adjust the frequency to whatever works for you. The most important thing is to be consistent. Sticking to a schedule prevents tiny errors from turning into massive headaches down the road.
Ready to stop wasting hours manually typing data from PDF statements? Bank Statement Convert PDF offers a tool that instantly turns your bank PDFs into clean, organized Excel files. Start your free trial today and see how much easier your next reconciliation can be.